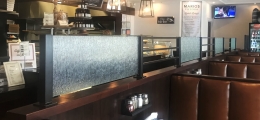
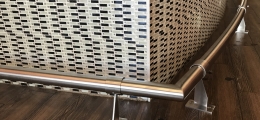
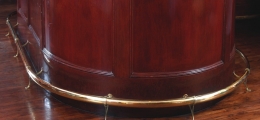
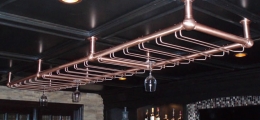
A foot rail is a necessity for any restaurant or pub bar. It provides a place for your customers to rest their weary feet and gives a clean, finished look to your bar. Installing a foot rail is relatively simple, provided you have properly measured and ordered the necessary components. In this article, we will break down all of the steps to choosing the bar foot rail that is ideal for your establishment.
As with any project, the key to a successful foot rail bar installation is preparation.
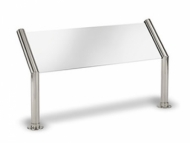
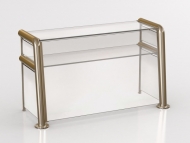
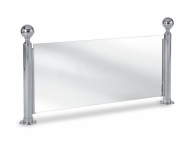
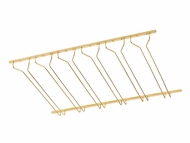
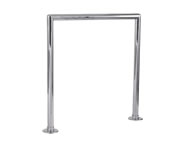
Foot Rail Components
There are many components that make up a bar foot rail. They include the tubing, brackets, elbow joints, wall flanges, flush angles, and end caps.
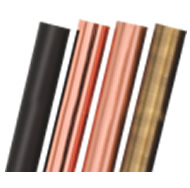
- The tubing is the long, cylindrical piece of metal on which your patrons will rest their feet. Bar rail tubing typically comes in 1.5” and 2” widths and is available in a wide variety of metals and finishes. While most foot rails use round tubing, custom foot rail fabricators also offer square tubing and oval tubing options.
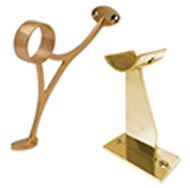
- The foot rail brackets support the tubing, and are evenly spaced along the length of the bar. To ensure your bar foot rail has enough support, a bracket should be installed 6” from either end of the rail, and then spaced every 4’ from the end brackets.
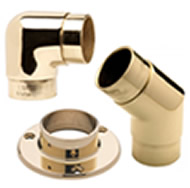
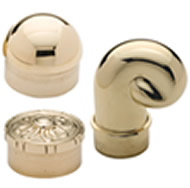
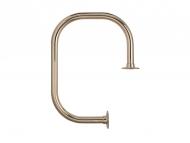
- Elbow joints are used any time there is a right angle (90˚) bend in your foot rail.
- A flush angle fitting is used when you need a run of foot rail tubing to bend at 135°.
- Use a foot rail wall flange when you want to mount foot rail or bar rail tubing to a wall
- The end caps are placed at either end of the tubing. They come in a variety of styles, ranging from simple to ornate. These decorative pieces are easy to attach and provide a clean, finished look to the foot rail.
Measuring for Your Foot Rail
It is extremely important to properly measure before ordering your bar foot rail tubing. To get an accurate measurement, follow these steps:
- Measure the length of each section of bar that will have a railing.
- Use these measurements to create a template of the bar. This visual image will help you to correctly order the components needed for your foot rail.
- Calculate the amount of tubing you will need. Tubing comes in 2’, 4’, 6’ and 8’ lengths. When ordering tubing, the fabrication team at ESP Metal Products always suggests to round up to the nearest foot. For example, if your bar length does not measure an even foot measurement such as 6’ or 10’, but rather has some inch increment, i.e. 5’ 4” or 9’ 7”, order the next foot size up. For example, a bar measuring 5’ 4” will require a 6’ length of tubing. A bar measuring 9’ 7” will require one 2’ and one 8’ piece of tubing. Always order more tubing than you need. It is much more difficult to connect pieces together than it is to simply cut off any excess tubing.
- Bars that are longer than 8-feet will require you to connect two pieces of tubing. This is a simple process that uses a hidden connector, known as a splicer, to join the pieces of metal tubing together.
- Once you have determined the tubing lengths you will need, calculate how many brackets you will need to properly support the metal tubing. As stated above, a secure and safe foot rail should have a bracket six inches from each end of the bar and every four feet from that point on.
- To round a corner, you will connect two pieces of tubing with an elbow joint. Count how many corners your bar will have to determine how many elbow joints you will need.
Measuring for a curved bar foot rail, is somewhat different and requires getting measurements for the maximum projection of the bar to determine the radius of the foot rail.
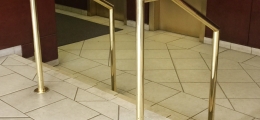
Foot Rail Finishes and Styles
Once you have determined the proper measurements for your foot rail, it is time for the fun part. When it comes to choosing the foot rail finish that will compliment your bar, the choices are plentiful. ESP Metal Products has a large assortment of custom finish options.
Some of the most popular finishes are polished brass, coated polished brass, satin stainless steel, polished stainless steel, and oil-rubbed bronze. ESP Metal Products also offers antique nickel, antique brass, antique bronze, antique copper, satin copper, and polished copper finishes.
Make note that certain metal finishes can be easier to keep clean than others. Polished finishes may show dirt and marks left by shoes, while matte or satin finishes are easier to maintain.
Getting Your Bar Foot Rail Fabricated
Once the necessary measurements have been collected, send them over to your fabricator along with the specific brackets, end caps, and finishes you want your foot rail to feature. Some fabricators — such as ESP Metal Products & Crafts — have a bar foot rail quote form on their website that makes it easy to submit measurements, choose your foot rail options, and upload blueprint or CAD files.
Installing Your Bar Foot Rail
As with any project, the key to a successful foot rail bar installation is preparation. Unpack all of the components of the foot rail and neatly lay them out. Be sure that you have all of the necessary brackets, screws, and tools on hand and within reach.
If any cuts need to be made to the metal tubing, measure and mark the pieces now. Measure twice, and cut once. A miter saw is recommended for easy and accurate cuts.
After all necessary cuts are made, loosely assemble the tubing, splicing it together where necessary. Slide the tubing through the brackets and place the assembled foot rail on the floor in front of the bar.
Measure and mark where your brackets will be installed on the face of the bar. Once the brackets are evenly spaced, install them with the mounting screws provided.
If you are using a wall flange in place of a support bracket, be sure to slide the flange onto the tube before securing that section of foot rail to the bar.
If your foot rail curves around a corner, you will need to attach an elbow to the installed foot rail first. Then attach the second loosely assembled foot rail section to the elbow. Attach the tubing to the brackets with setscrews.
The last part of the installation process is attaching your end caps. Depending on the style of end cap you chose, installation may be as simple as sliding the cap over the tubing. In certain cases you may need to attach the end caps with setscrews.
If you are not comfortable installing your bar foot rail yourself, most manufacturers will provide this service for you, at an additional cost. ESP Metal Products installs many of the foot rails that it fabricates for its clients.
Adding a foot rail to your bar is a relatively easy upgrade that will add aesthetic value and comfort to your business. Contact ESP Metal Products at 631.284.6383 or at shop@espmetal.com with any questions or inquiries.
TAGS: restaurants, bars, foot rails, bartenders