Bar add-ons like foot rails can help make your bar more aesthetically pleasing, and they can also be utilized by customers to increase comfort levels. A bar rail system may include end caps, brackets and elbows that connect together to form the perfect foot rest. There are several factors to consider when choosing your bar rail including the product’s finish, the dimensions of the bracket, bracket spacing, type of bracket and optional end caps. Many of these systems come with easy-to-install instructions that allow you to complete the project yourself, or you can have your new bar rail installed by a professional.
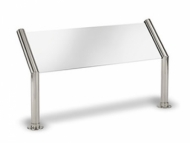
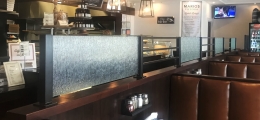
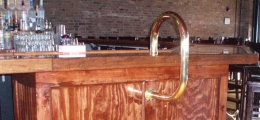
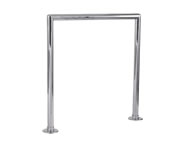
A custom foot rail provides a classy and practical finishing touch to your bar.
Considerations
While bar rails are often left as an afterthought, carefully considering the options for your customizable bar rail before you build your bar has its advantages. Knowing beforehand what types of material your bar rail will be made of, the dimensions of your brackets and the spacing and thickness of your rails will prevent you from having limited choices after your bar is already constructed. A foot rail is much more than just an addition to your bar. It provides both a functional purpose and can enhance your bar’s entire atmosphere when installed correctly.
Finish
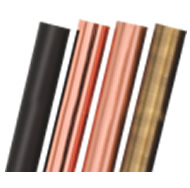
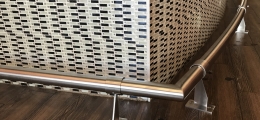
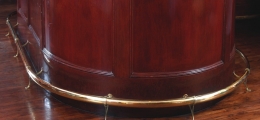
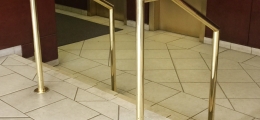
The tubing on your bar rail will be what your customers rest their feet upon, so choosing a finish is an important step in creating your unique bar foot rail. Bar rails come in a variety of styles and finishes, so you can easily choose the shape, size and style that suits your bar’s personality. Available finishes include satin stainless steel, polished stainless steel, unstained wood or polished brass. A popular choice for outdoor bar rails is brass, and most agree that stainless steel rails are the most durable option.
Bar Rail
Next, determine the amount of tubing you will need for your bar area by measuring from one end of the bar to the other. Experts recommend creating a virtual rail with measuring tape, string or scotch tape to more accurately visualize and measure the appropriate lengths needed. Bar rail tubing is typically available in lengths of eight feet.
You will need to calculate the number of tubing pieces needed and how many connecting pieces will be required. If your tube will be connected or joined at a corner, then don’t forget to include the dimensions of the necessary bracket. Always round up the number of feet of required tubing when ordering, and order a little extra when in doubt.
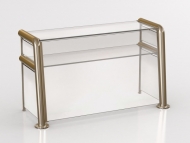
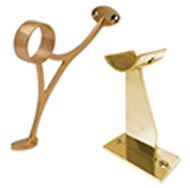
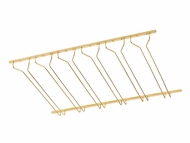
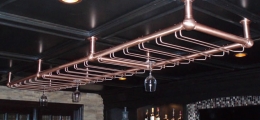
Bar Brackets
Bar brackets are necessary because they will stabilize your bar rail’s tubing. You will want to select a style and finish that matches the overall feel of your bar, determine an appropriate spacing distance and calculate the overall number of brackets that you’ll need. The spacing distance between your brackets is both for support and for aesthetic appeal.
Brackets that are too close together might be an eye sore, but leaving too much space between brackets will result in insufficient support. Brackets can either be mounted to the floor, bar wall or both the bar wall and floor. The option you choose will influence the bar rail’s overall look, stability and flexibility.
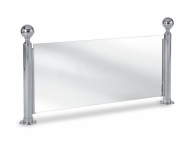
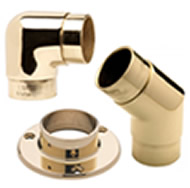
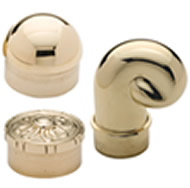
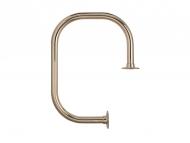
End Caps
Good end caps will be the perfect finishing touch to complete the look you’re trying to achieve. These end caps may be flat, rounded or decorative, but be aware of how much length an end cap will add to your overall rail. Together, the end caps, brackets and tubing are the three main components that you’ll need to consider before installing your bar rail system.
Installation
Once you have considered the three main parts of your bar rail system, it is time to begin the installation. You can choose to have a professional install your rails to ensure all the pieces are put in place correctly, or you can opt to do it yourself.
Bar rail installations are moderately easy to install, and the job requires only a few tools. You will need an electric drill, Phillips screwdriver, file, hack saw and channel lock pliers. The first step is to make any cuts to your tubing that you will need. Start by measuring and marking the cuts you will be making. *To ensure the stability of the foot rail and to obtain the most aesthetically pleasing result, it is important to make all cuts in areas of the tubing that will be hidden by a bracket. It is always a good idea to double-check the measurements of the tubing you will need before making any cuts.
After all necessary cuts are made, attach the pieces of the foot rail by inserting the tubing through the brackets. Next, slide the tubing through your brackets and mark the locations where you will want to attach the brackets. Attach the brackets securely to the bar, starting with the straight sections first.
All corner pieces will require installation of an elbow joint. Attach the elbow to the installed foot rail first. Then, connect the elbow with the second loosely assembled foot rail section. Secure any loose tubing to the brackets. Attach your end caps, and your job is complete.
When installing a bar rail, it is crucial to consider factors like the finish, brackets, tubing and end caps before beginning your project. Once you’ve determined these factors, the difficult parts of the installation process will be complete, and you’ll only need to put all the pieces together to begin utilizing your new bar rail.
TAGS: bars, design, foot rails